Once you are ready to commence stocktake, you need to create a new stocktake in BBS.
Ensure that end of day reconciliation’s and invoice updates are all complete prior to creating a new Stocktake.
Stock committed to sales orders that has not yet been invoiced (eg not yet picked, or part picked and not invoiced) MUST BE COUNTED in the stocktake. Any stock invoiced and not updated (ie 'stock on consignment' should NOT BE COUNTED in the stocktake).
1.Open the Stocktake Control Panel
2.Click the New Stocktake button.

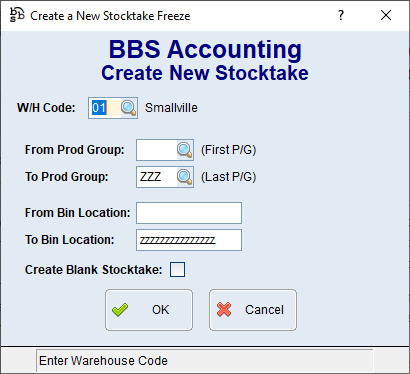
Click OK to select all product groups and all bin locations if counting an entire warehouse, or enter required product groups and/or required bin numbers for a rolling stocktake. Tick Create Blank Stocktake to create a new stocktake with no products selected to be counted. (Only the products that are then entered/scanned into the stocktake will be considered in the stocktake and will have their quantities adjusted as required).
When using count sheets, click on Generate & Print Count Sheets. If using Manual Entry or Barcode Scanning to count stock please refer to Stocktake Procedure - Using Manual Entry or Barcode Scanning.

3.Print Count Sheets - First Count
a.Enter the number of teams to break up the count sheets into batches. This will ensure that the products are distributed evenly across the count teams.
b.Leave options on their defaults
c.Click OK - This will allow count sheets to print.
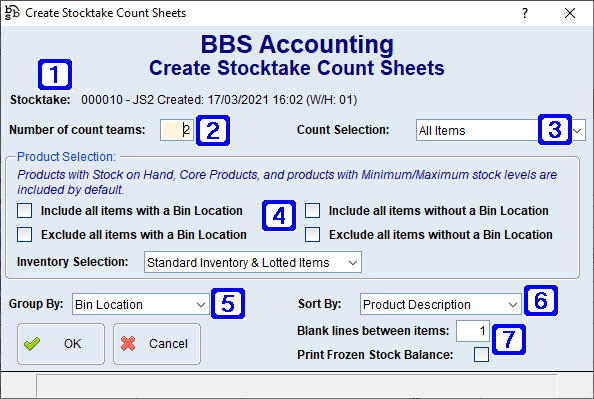
Create Stocktake Count Sheets Screen
|
Stocktake - Displays the selected stocktake number, operator code, date and time the stocktake was created. |
|
Number of count teams - The number of teams the count sheets will be apportioned to. |
|
Count Selection: •All Items - All items in the selected stocktake will be included on the count sheets. •Items with discrepancies - Only items with count discrepancies will be included on the count sheets. •Items not yet counted - Only items that have not yet been counted in the selected stocktake will be included on the count sheets. |
|
Product Selection: Products with Stock on Hand, Core Products and products with Minimum/Maximum stock levels are included by default. •Include all items with a bin location - Will include all items with a bin location that aren't included by default. •Exclude all items with a bin location - Will exclude all items with a bin location that aren't excluded by default. •Include all items without a bin location - Will include all items without a bin location that aren't included by default. •Exclude all items without a bin location - Will exclude all items without a bin location that aren't excluded by default. Inventory Selection: •Standard Inventory & Lotted Items - Will include standard and lotted items on the count sheets. •Standard Inventory Only - Will include standard inventory items only on the counts sheets. •Lotted Items Only - Will include lotted items only on the count sheets. |
|
Group By: •Bin Location - Will group the items on the count sheets by bin location. •Product Group - Will group the items on the count sheets by product group. |
|
Sort By: •Product Description - Will sort the Group By selection by product description. •Product Code - Will sort the Group By selection by product code. •Manf Part No - Will sort the Group By selection by manufacturer part number. |
|
Blank lines between items - The number of blank lines to leave between item on the count sheets. Print Frozen Stock Balance - When ticked the stock balance for each item at the time the stocktake was created will print on the count sheets. |
4.Perform the first count.
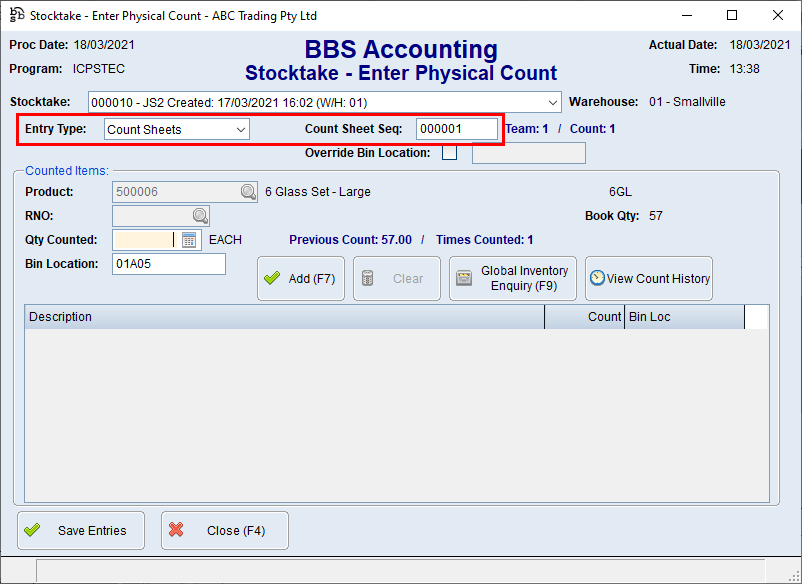
5.Enter the physical counts by clicking on Enter Physical Counts.

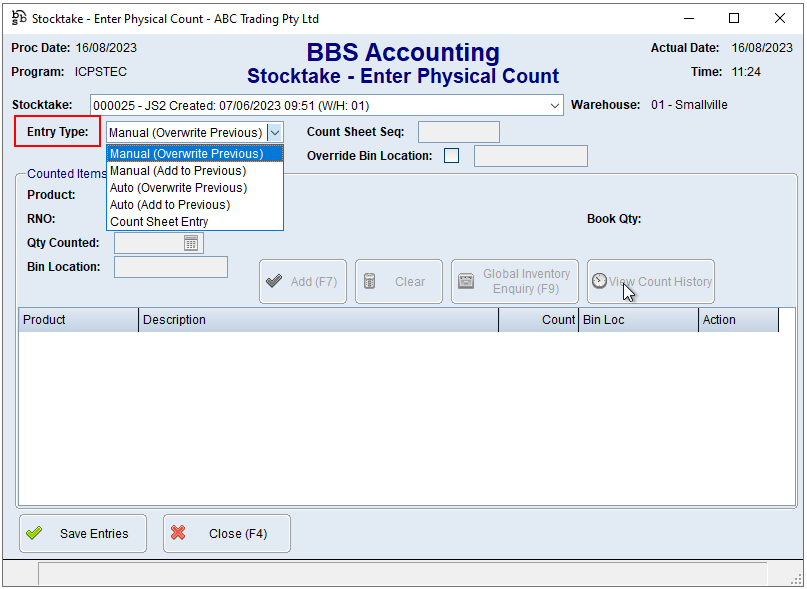
a.From Entry Type drop down box select Count Sheets.
b.Enter count sheets using sequence number at the top of count sheets
c.Each product or product/RNO (Lotted Items Record Number) combination on the count sheet will come up and users just needs to enter the counted quantity and press enter.
6.Print Missing Count Sheets by clicking Generate & Print Count Sheets.
Missing count sheets will only print if a discrepancy has occurred between sheets printed and sheets entered.
a.Enter the number of teams to break up the count sheets.
b.From Count Selection drop down box select Items not yet counted.
c.Leave all other options on their defaults.
7.If any sheets are produced, count them and enter physical counts using the count sheet sequences (same as step 5).
8.Perform a second count if required by clicking Generate & Print Count Sheets (Optional).
a.Enter the number of teams to break up the count sheets.
b.From Count Selection drop down box select Items with discrepancies.
b.Leave all other options on their defaults.
9.If any sheets are produced, count them and enter physical counts using the count sheet sequences (same as step 5).
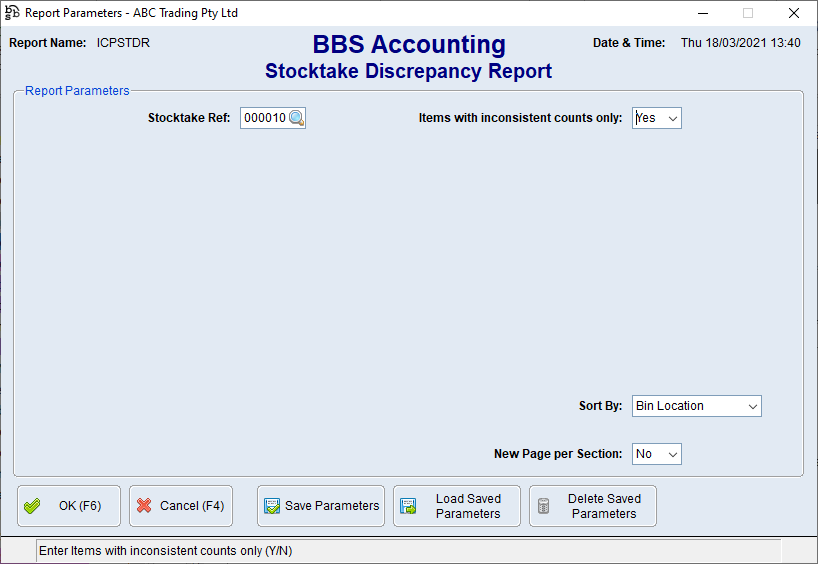
10.Run the Count Discrepancy Report by clicking Count Discrepancy Report. (This will print a report for all items inconsistently counted even after second count.)

The stocktake number should come up automatically, change Items with inconsistent counts only to Yes.
11.Perform (re- count) using Stocktake Discrepancy Report.
Count should match one of the counted qty's in the Count History column or Book Qty.
a.Only counts not equal to the count qty column need to be re-entered.
b.From Entry Type drop down box select Manual (Overwrite Previous)
c.Enter each product code, or product code/RNO combination, and the correct count quantity.
It is recommended the below reports are run and saved for future reference.
A.Print Count Discrepancy Report (total variance) from Stocktake Control Panel.
i.Stocktake number should come up automatically
ii.From Items with inconsistent counts only drop down box select No
iii.From Sort By drop down box select Product Group
B.Print Stocktake Physical Count Report from Stocktake Control Panel.
i.Stocktake number should come up automatically
ii.From Sort By drop down box select Product Group
12.Run Update Stocktake Results from Stocktake Control Panel to finalise the stocktake and update all the results.
i.Printing of Audit Trail is optional.


