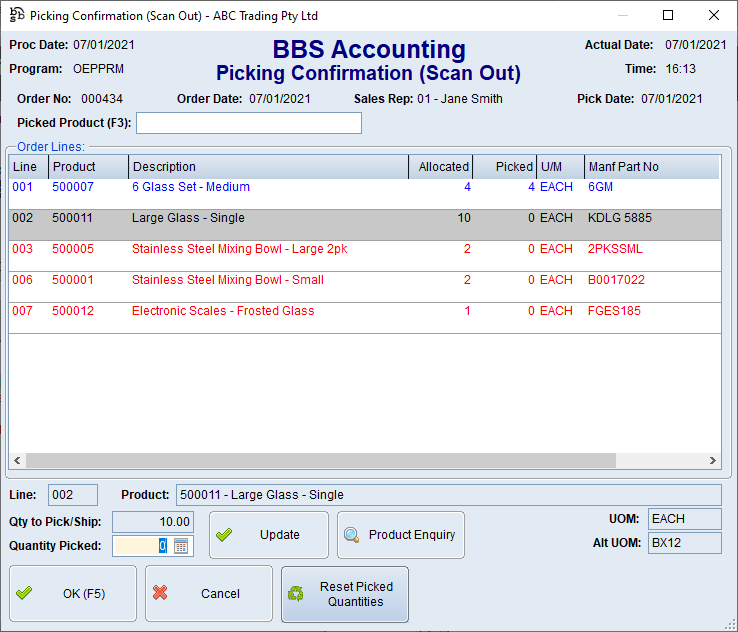
|
Main Menu > Sales Ordering > Invoicing > Picking Run Maintenance & Invoicing Main Menu > Warehouse > Picking Run Maintenance & Invoicing |
The Picking Run Maintenance & Invoicing program allows users to confirm sales orders that have been generated and printed in the Print Picking Slips & Picking Run program, where goods have been picked and are ready to be despatched. Users can also remove orders from the picking run when they have been part picked and are waiting for more stock to arrive or when they can't be picked and have to be removed for order maintenance. Please refer to Picking, Packing & Despatch Process (Picking Run) for more information.
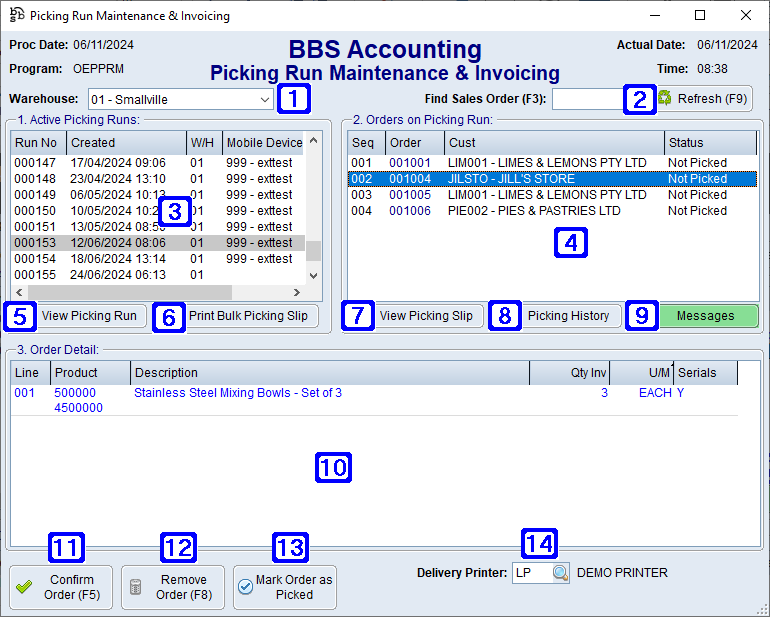
Picking Run Confirmation & Maintenance
|
Warehouse - Displays the warehouse the goods are being picked from. Only Picking Runs generated for this warehouse will be displayed. |
|
Find Sales Order (F3) - Allows users to search for a particular sales order that is on an active picking run by entering the sales order number. Refresh (F9) - Refreshes the screen to reflect any entries that may have been updated since opening the Picking Run Confirmation & Maintenance screen. |
|
Active Picking Run - Displays a list of active picking runs with the date/time they were created. Where the picking run was created on a mobile device, the mobile device name will be displayed. |
|
Orders on Picking Run - Displays the sales orders on the selected active picking run. |
|
View Picking Run - Allows users to view the PDF of the Picking Run. |
|
Print Bulk Picking Slip - Allows users to print a consolidated picking slip for all orders on the Picking Run. |
|
View Picking Slip - Allows users to view the PDF of the Picking Slip. |
|
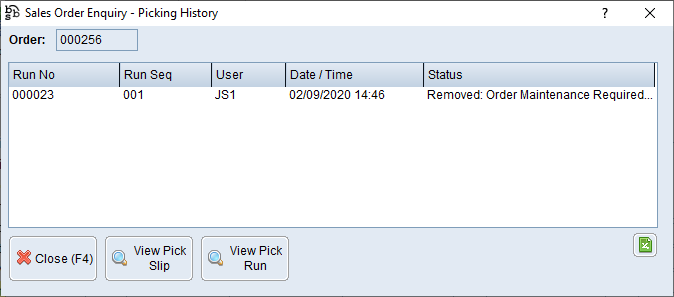
Picking History - Allows users to view a list of the picking history.
View Pick Slip - Allows users to view the PDF of the Picking Slip. View Pick Run - Allows users to view the PDF of the Picking Run. |
|
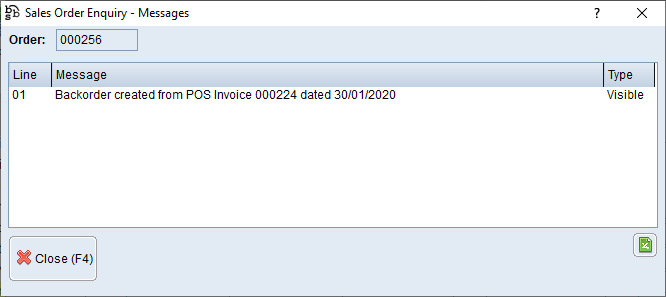
Messages - Allows users to view a list of messages attached to the Sales Order.
|
|
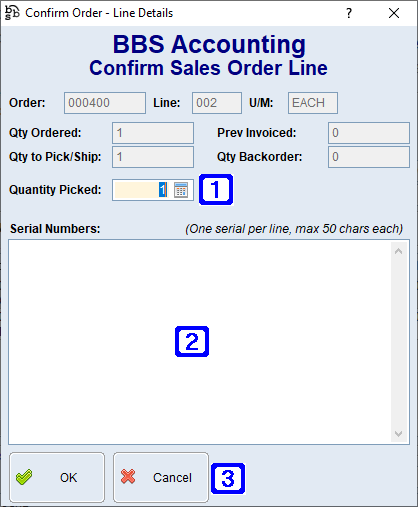
Order Detail - Displays the product lines on the selected sales order. Double clicking a line will open the Confirm Sales Order Line screen for the associated sales order line. Please refer to Confirm Sales Order Line for more information on how to change the quantity picked or to add serial numbers. |
|
Confirm Order (F5) - Will confirm the sales order and navigate users to Invoice/Confirm Sales Order screen. |
|
Remove Order (F8) - Will remove the order from the picking run. Users will be required to enter a reason why the sales order is being removed. Please refer to Removing an Order from the Picking Run for more information. |
|
Mark Order as Picked - Marks the order as picked without confirming/invoicing it, this will also remove all stock from being shown in reserve. |
|
Send Order Collection SMS - Allows users to send a SMS to the customer notifying them that their sales order is ready for pick-up/collection. Please refer to Send Order Collection SMS for more information. |
|
Delivery Printer - Displays the printer the delivery dockets and invoices will print to. Users can select an different printer by clicking |
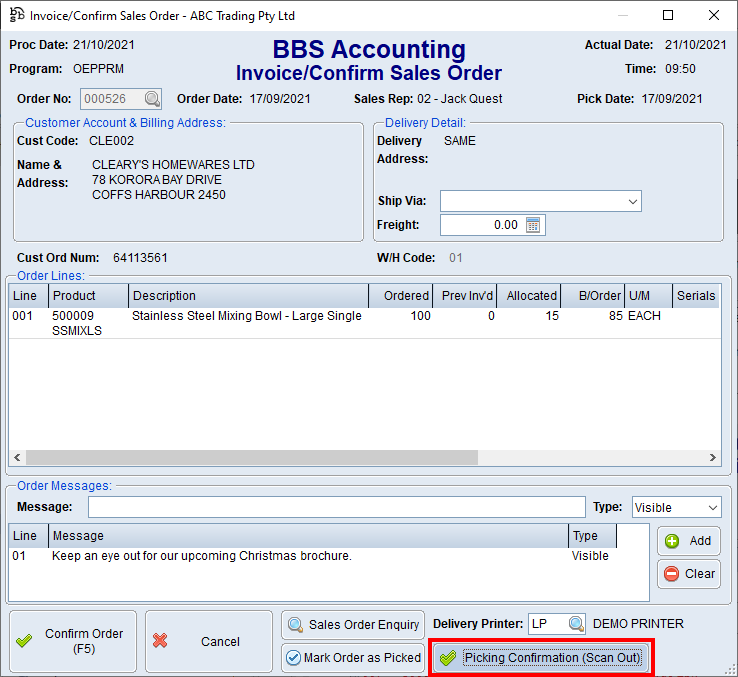
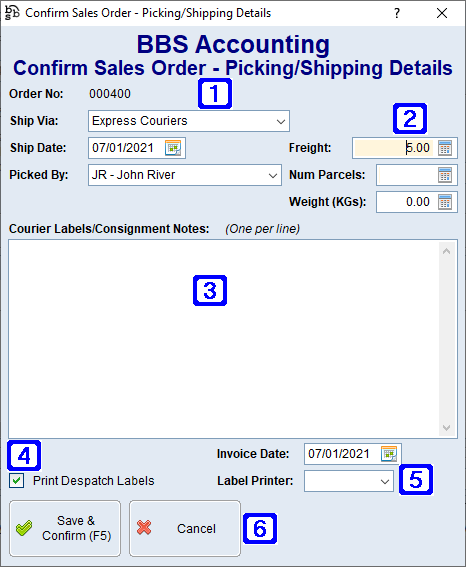
The Invoice/Confirm Sales Order screen allows users to invoice a sales order.
Invoice/Confirm Sales Order Screen
|
 Removing an Order from the Picking Run
When an order is removed from the picking run the below screen will pop up confirming that you want to remove the sales order. Users should click Yes.
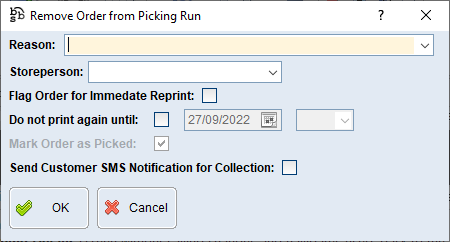
Once users have confirmed they want to remove the sales order from the picking run, users can select a reason as to why the sales order is being removed by clicking on the drop down arrow, users are also required to select the Storeperson who is removing the sales order from the picking run. The sales order can be flagged for immediate reprint by ticking the Flag Order for Immediate Reprint box, set to not print again until a certain date and time by ticking the Do not print again until box and selecting a date and time, mark the order as picked by ticking the Mark Order as Picked box or send a SMS to the customer notifying them that their order is ready for collection by ticking the Send Customer SMS Notification for Collection box (Please refer to Send Order Collection SMS for more information), Click OK.
|





 if required.