|
Main Menu > Debtors > Maintenance > Customer Masterfile Maintenance
|
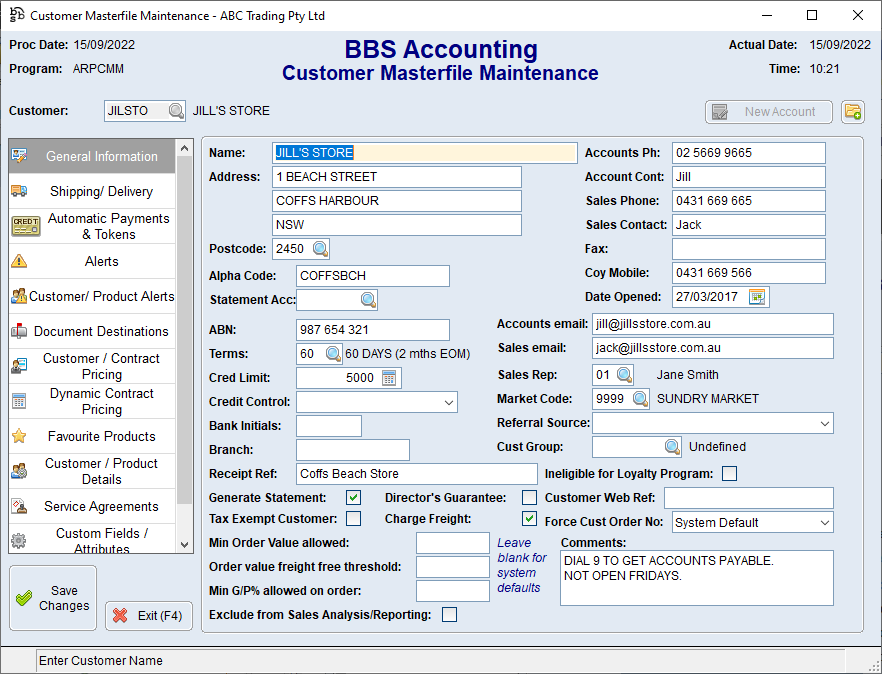
Customer Masterfile Maintenance is used to add new customers and maintain existing customer information. This screen has multiple tabs with each tab described in it's own topic.
General Information Tab
Shipping/Delivery Tab
Membership
Automatic Payments & Tokens
Alerts Tab
Customer/Products Alert Tab
Document Destinations Tab
Customer/Contract Pricing Tab
Dynamic Contract Pricing Tab
Favourite Products
Customer/Product Details Tab
Customer Spend Quotas
Service Agreements Tab
Managed Print Services
Custom Fields/Attributes
 Creating a New Customer
Customers have a unique code, up to six alpha-numeric characters. There are two ways to create a customer code.


|
You can choose a code yourself by entering it into the Customer field. When entering a code yourself, BBS will confirm that you want to create a customer with the code entered.
|

|
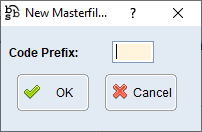
BBS can allocate you a code in a three-letter + three-number format by selecting the New Account button. When using the New Account button, BBS will request you to enter a three letter prefix, and it will assign the next number available in the sequence.
|

|
Navigates users to the Quick Attach File to Debtors Account screen to attach files to the debtor. Please refer to Quick Attach Files to Debtor Account for more information.
|
Once a customer code has been selected, you can then fill in the required information on each tab.
Make sure that the information is filled in for the General Information tab and the Shipping/Delivery tab (if the delivery address is different from the billing address)
The Document Destinations tab also needs to be filled in or when changes to the relating customer tabs are saved a prompt will appear to automatically select the document destinations, refer to the section below.
The remaining tabs can be filled in at a later date.
Click the Save Changes button before exiting or all changes will be lost.
|
 Editing an Existing Customer
Users can edit an existing customer by accessing the existing customer file, you can find the customer file by using one of the three methods mentioned below.
Enter the customer code exactly as you have recorded it into the Customer Masterfile Maintenance screen and press enter.

Leave the customer code box blank and use the  button to search the customer list to find it. button to search the customer list to find it.
Open the customer in Global Customer Enquiry, find the customer you wish to edit, and click 'Jump To (F8)' > Customer Maintenance
Make the changes to the customer masterfile as required.
|
 Converting Prospects & Pay On Pickup Accounts to Live Accounts
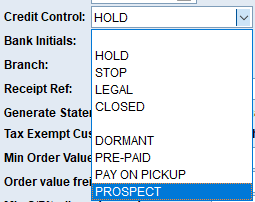
When a prospect or pay-on-pickup customer is to become a debtor account with credit, users will need to change the Credit Control field from PROSPECT or PAY-ON-PICKUP to Blank in Customer Masterfile Maintenance.

Set the terms and credit limit for the customer. Enter any missing details such as accounts contact, phone and email addresses (see the Customer Masterfile Maintenance screen above for details)
The Document Destinations tab will need to be filled in or when changes to the Customer Masterfile Maintenance tabs are saved a prompt will appear to automatically select the document destinations, refer to section below.
|
 Automatic Prompting for Document Destinations
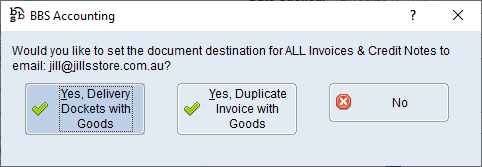
When creating a new customer, or opening a live account from a prospect or pay on pickup account, you will be prompted to set up document destinations for invoices, statements and loyalty statements for the email addresses on the customer account.

If you answer No to the question above, you will be prompted to set the document destination separately for Direct Delivery Invoices and Credit Notes.


|
Users with access can amend a Customer in the Contact Relationship Manager or Global Customer Enquiry by clicking on the Jump To (F8) button or by hitting the F8 key on their keyboard and then selecting 6. Customer Maintenance, make the necessary changes required and click Save Changes.
 Converting Prospects & Pay On Pickup Accounts to Live Accounts
 Automatic Prompting for Document Destinations


 button to search the customer list to find it.


